 This watercolour project has taken forever. I was going to paint rushes in front of the river at Ballynahinch castle. You will find the full picture in my post of 18 July. I have to admit I found the whole thing too daunting. I spent a lot of time staring at the picture, wondering how I would go about it. There was too much details for me to handle. So, I decided to just paint a part of it. I cut the picture in Adobe Photoshop Elements and printed it.
 What I liked about this particular section of the picture was the contrast between the bright yellow on the right and the darker green elements in the middle. And I loved the colour of the water. And the straight leaf veins going up. Here is a detail of the end result. I think the detail looks better than the overall effect
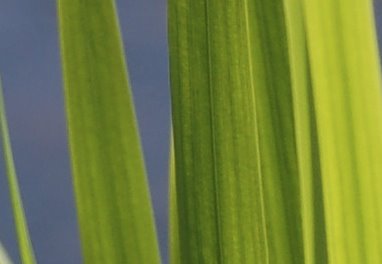
 My greens are a bit too blue, and I should have kept the yellow on the right pure yellow rather than glazing it with blue. But I was happy with how I managed to do the leaf veins. I put a book on each side of the painting, and, after adding a blue glaze, when the paper was still wet, I used a ruler and a wooden cuticle stick to draw a groove into the paper. The paint tends to accumulate in the groove, making it darker than the areas around it. Unfortunately, I put too much water on the masking paper when I stretched the watercolour paper, with a result that the masking paper lifted, and the watercolour paper buckled a bit when I applied the first wash.
I think I need another go at it to get it just right!
No comments:
Post a Comment